Thursday, December 30, 2010

Hawaiian Haupia


Recently I’ve been feeling a little nostalgic for home. For whatever reason, the chilled and snowy landscape of Massachusetts hasn’t been satisfying my longings for Hawaii. Strange, I know. To fight off the blues, I decided to make a dessert from home for a recent potluck we’ve hosted. The dish happens to be a coconut gelatin called haupia. It is the sort of thing that you don’t generally eat a ton of in one sitting, but is found at every luau or Hawaiian food place. If you don’t like coconut or jello, stay away. However, if you love coconut in any shape or form like I do, then this is an easy must try.

The recipe makes 20 small servings, takes 5 ingredients and only about 15 minutes of active time.


1 can of coconut milk

1 cup of milk

1 cup of sugar

1 cup of water

½ cup of cornstarch


Start off by heating the coconut milk, milk and sugar together in a large saucepan until all the sugar dissolves and

the mixture is fairly hot.

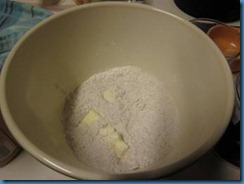
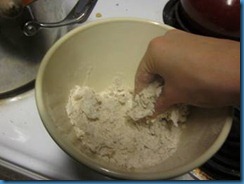
In a small bowl mix the water with the cornstarch. The cornstarch will keep settling on the bottom, so you will have to mix it frequently. I suggest trying to mix it with your hand, because it does this strange thing where it becomes texturally REALLY interesting…

Back to the recipe- While stirring furiously, add the dissolved cornstarch and water into your saucepan. Crank the heat up if necessary to get the mixture to that point JUST short of boiling and continue to stir as if your life depended on it. The coconut goop will start to thicken, but keep going until the surface begins to hold its shape (when the stirred part stays raised instead of melding back into a solid surface of white).


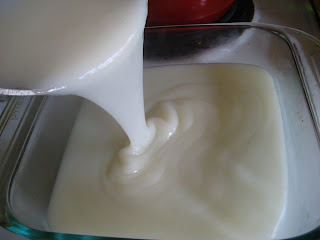
At this point you can give your wrist a break, remove the concoction from heat and hunt down a dish to let it set in. Depending on how thick you want your cubes I would recommend an 8x8 or even a bit smaller. When you have the dish picked out, go ahead and pour the mixture in as evenly as you can.

Pop the dish into the refrigerator for at least an hour, cut into small cubes and serve!


Yes, that easy. I suggest keeping the haupia chilled until you are about ready to serve, but the whole thing should keep for a week if covered well.

E'ai ka-kou!

~ Kai

Thursday, December 16, 2010

Failgels or The Case of the Mushy Bagels

November wasn't my proudest of baking months. For whatever reason, I fell into a slump of botched baking experiments. They all had such great potential, but really seemed to end up a disaster... My bagels in particular were a terrible disaster. They tasted right and looked pretty, but something happened to the holes and the dough around that center part remained mushy, despite repeated baking and even attempts at toasting it dry. It wasn't even that the dough was uncooked- it became actual MUSH. You may ask why I am posting a failed recipe... well it's because I think I figured out what might have gone wrong, and I want to put the challenge out to you to try the altered recipe and discover if the recipe turned out as great as I hoped it would. Also, I took really pretty pictures of the process and I want to post them!

The actual bagels came out prettier once baked, but I forgot to snag a picture of them once they came out... Oops!

The recipe is a (now) modified version of one I found on Allrecipes. I made a whole wheat version, added my own topping, and cut back on the boiling time. You can find the original here.

Makes approximately 12 smaller bagels or 8-9 larger ones.

2 1/4 cups all purpose flour
2 cups whole wheat flour
2 packets of instant-dry yeast (or just dump in 2 tablespoons and a bit like me!)
1 1/2 cups of warm water
3 tablespoons of sugar
1 tablespoon of salt
and either 1 tablespoon of sugar or 3 tablespoons of baking soda.
3 tablespoons of onion flakes
1 tablespoon of dried garlic powder
3 tablespoons of toasted sesame seeds
1/2 a tablespoon of salt

First, like all yeast-tastic doughs, we start with activating the yeast. The recipe here is unusual in that instead of activating the yeast with the water, then adding it to the dry ingredients, you first mix 1 1/2 cups of all purpose flour with the yeast. Also mix separately the water, sugar and salt, then add it to the dry ingredients and mix thoroughly for a bit.

Start mixing in the rest of your flour gradually, until you have a somewhat stiff dough. Flour a clean surface lightly and knead that sucker for about 10 minutes. Cover it up and let it rest for 15 minutes.
When that's done, divide up the dough into however many bagels you want to make. Shape each into a ball, then poke your finger through the middle and slowly enlarge the hole. I recommend a larger opening than you think reasonable, because it will rise and you don't want that space to close back up! Cover the bagels up and let rise for 20 minutes.

You should now start up a big boiling pot of water, though there's no need to fill it really high. Add either the sugar or baking soda (depending on what you decided on) to the water. Now some of you may find it odd to boil the bagels, but it's the process it undergoes when getting boiled that gives it that super crispy crust you love about bagels. Let's not jump the gun however, first broil those bad boys at 450 for just a minute or two on each side. NOW toss em into the water in small groups and allow to sit at a simmer for just about 1 minute then take em out and lightly pat em dry.

I am a sucker for everything bagels, so go ahead and mix those last ingredients together (or whatever you want to top your bagels with) and sprinkle generously on top of the bagels. You can even go ahead and give it a light pat to make sure it sticks nicely to the gelatinous feeling dough (if you've ever made bagels or pretzels before, you know what I'm talking about).

Lightly grease a baking sheet and bake at 375 (oh yeah, you should probably preheat the oven) for about 35 minutes, flipping half way in-between. At this point they should be looking amazing, and with any luck they won't have the consistency of dumplings in the center!

Es gezunterheyt!
~Kai

P.S. If you are brave enough to try this, please let me know how it turned out!

Sunday, December 5, 2010

Baby It’s Cold Outside

BRRRRRRRR

IMG_0963

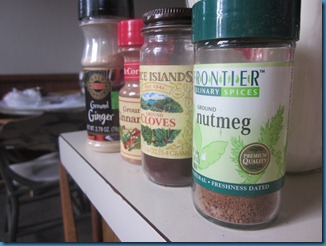
These spices mean business

The temperature dropped. I suppose it is December, but I just realized I’m not ready for it to be dark and cold.

Besides cold December means one thing: Finals.

It means spending Friday nights in the library instead of relaxing, trying to find new ways to remain productive, running through the library to get rid of restlessness, and a great reason to try cooking more.

So when I woke up this morning I realized that I was cold and did not want to start writing my paper.

Solution? See those spices?

Baked comfort, er…oatmeal.

It tastes best wrapped in a blanket as the steam hits you in the face.

Fact.

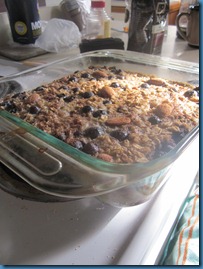
Baked Blueberry Banana Oatmeal

Adapted from Seven Spoons

Ingredients
2 cups large flake rolled oats (not instant)
1/2 cup sliced almonds, lightly toasted
1/3 cup brown sugar, packed
1/4 cup pumpkin seeds, lightly toasted
2 teaspoons flax seeds
1 teaspoon baking powder
1 teaspoon ground cinnamon
1/4 teaspoon ground ginger
1/8 teaspoon ground nutmeg
1/8 teaspoon ground clove
1/8 teaspoon kosher salt
2 cups milk

1 large egg
2 tablespoons unsalted butter, melted
1 teaspoon vanilla
1 teaspoon pure maple syrup
1 medium banana, mashed
1 cup frozen blueberries (not thawed)

Preheat oven to 375°F . Grease a 8x8 baking dish.

IMG_0958

In a medium bowl, mix together the oats, almonds, brown sugar, pumpkin seeds, flax seeds, baking powder, spices and salt.

IMG_0964

In another bowl, whisk together the milk, egg, banana, vanilla and maple syrup.

In the prepared baking dish, scatter the blueberries and pile the oat mixture to cover the fruit, but do not pack too tightly. Carefully pour the wet milk mixture over the oats.

Bake for 35-40 minutes, until the oatmeal is puffed and set, with a golden brown top.

Makes about 4 big servings.

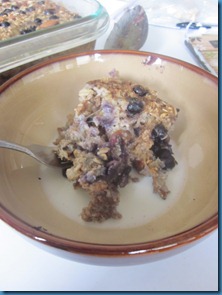
IMG_0976It’s really great with a bit of milk and a drizzle more maple syrup. I’m sure you can substitute any seeds or fruit that you have on hand as well.

IMG_0983

mmm warmth.

Damn….back to work

Leah

Saturday, November 20, 2010

Hearty Tomato and Dumpling Soup

Check it out. It didn’t take two months for me to post.

I’m getting good at this.

Also, I really hope that one day I look back at these blog posts and realize how BAD my pictures were, as in, I get BETTER.

(one can dream)

clip_image002

People always talk about chicken and dumplings.

I have no idea what that is. I never ate it as a kid…or a teen…or a college student.

To be honest, the concept of dumplings kinda confuses me, especially because the first time that I looked up what they were, the recipe literally said flour, salt, water.

????

However, I did find this awesome looking recipe on A Cozy Kitchen for Tomato soup with herb dumplings. Cute blog, good recipes, check it out.

But this soup caught my attention for a few reasons

· I had everything just lying around for it (major plus)

· It incorporated chickpeas (protein is always good)

· The dumplings contained WAY more than just flour (cheese and herbs!!!)

I played with the recipe a bit by adding more spices and some chard that we had from our CSA.

The end result was a pretty good tasting soup, but I learned I know NOTHING about dumplings.

In fact they turned out kinda like mushy balls of herby cheese flour. If you poke them too hard they disintegrate into the soup...which made it thicker….I guess that’s a plus?

What did I do wrong?

Maybe you know?

Anyways, it’s filling and tastes good, but next time I either need to figure out what this dumpling deal is or just stick to my usual piece of bread with soup.

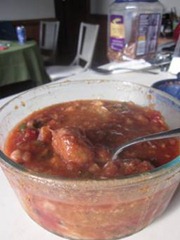
Hearty Tomato and Herb Dumpling Soup

Adapted from the Cozy Kitchen

Soup
1 tablespoon olive oil
1 small onion, chopped
2 cloves garlic, crushed
½ teaspoon ground coriander
2 teaspoon cumin
1 teaspoon chili powder
1 can chickpeas, drained and rinsed
1 ¾ cup vegetable stock
1 14oz can chopped tomatoes

1 cup chopped chard (optional)

Dumplings
1 cup all purpose flour (I used half whole wheat)
1 ½ teaspoons baking powder
½ teaspoon salt
2 tablespoons butter, chopped
2 tablespoons grated Parmesan cheese
2 tablespoons chopped fresh herbs ( Thyme, Chives, Rosemary, your choice)
3 tablespoons water

clip_image004

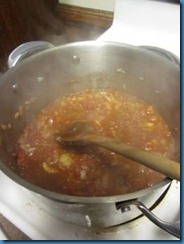
Heat the oil over medium-high heat in a large saucepan and sauté the onion for 2-3 minutes or until soft. Add the garlic, cumin, coriander and chili powder and cook for 1 minute. Add the stock and tomatoes and blend with an immersion blender (or anything that blends, I used a food processor and only blended half to keep some of the chunkyness)

clip_image006clip_image008

Stir in the chickpeas and bring to a boil. Once it boils reduce the heat and simmer, covered, for 10 minutes.

clip_image010clip_image012

To make the dumplings, sift together the flour, baking powder and salt. Add in the chopped butter and knead with your fingers until the mixture starts to resemble fine bread crumbs. Stir in the cheese and herbs, and then make a well in the center of the mixture. Add in the water and mix together

Divide the dough into 8 portions and roll into small balls. Add the dumplings to the soup, cover and simmer for 20 more minutes.

clip_image014

If you know anything about dumplings, I’d suggest trying it out! I loved the idea but I would have liked a better result.


Happy cooking!

Leah

Sunday, November 14, 2010

Baguettes


Bread is wonderful.

Not that stuff you get presliced from the grocery store where you have to stare about about 80 different kinds and try to choose which one is right for you.

Really...what's the difference between Multi-grain, hearty grain, and healthy grain mix???

I'm talking about fresh from the oven, flavorful, crusty deliciousness.

Unfortunately... I had no idea how to create that.
Until now


About two months ago, we hosted a wine and cheese party (...just to give you an idea of how behind in posting I am).
I figured that would be the perfect time to try to tackle this tasty mystery.


(definitely still in my pajamas there...it had to rise a while)


It turns out the key to a good hard crust on bread is to spray it with water when it goes in the oven, or create steam by putting ice cubes in the bottom of your hot oven.

The recipe I used was from King Arthur Flour's baking blog.


It was an overnight dough that used a tiny amount of yeast and a long rising time

The blog give a great detailed description of the process which made everything significantly easier.
While my bread didn't come out beautiful, it did have a nice crisp to it, and we ate all three baguettes in the course of the party.


I'd call that a success.


Bread is wonderful....
Try it.


Baguettes
(From King Arthur.com)

Starter
1/2 cup (4 ounces) cool water
1 cup (4 1/4 ounces) King Arthur Unbleached All-Purpose Flour or Unbleached Bread Flour
1/16 teaspoon instant yeast

Dough
All of the starter
r 1 teaspoon active dry yeast
1 cup (8 ounces) lukewarm water*
3 1/2 cups (14 3/4 ounces) King Arthur Unbleached All-Purpose Flour or Unbleached Bread Flour*
1 1/2 teaspoons salt

*If you use bread flour, increase the water to 1 cup + 2 tablespoons (9 ounces).

The Starter: Mix the starter ingredients together till smooth, cover, and let rest at room temperature for about 14 hours; overnight is good.

Preparing the Dough: Mix the yeast with the lukewarm water. Combine the starter, yeast, water, flour, and salt, and mix and knead them together till you've made a soft, somewhat smooth dough; it should be cohesive, but the surface should still be a bit rough. Allow the dough to rise, covered with lightly greased plastic wrap, for 3 hours, gently deflating it and turning it over after 1 hour, and then again after 2 hours.

Turn the dough out onto a lightly greased or floured work surface. Divide the dough into three pieces. Shape each piece into a rough, slightly flattened oval, cover with greased plastic wrap, and let rest for 15 minutes.

Working with one piece of dough at a time, fold the dough in half lengthwise, and seal the edges with the heel or edge of your hand. Flatten it slightly, and fold and seal again. With the seam-side down, cup your fingers and gently roll the dough into a 15" log . Place the logs in the folds of a floured couche or floured cotton dish towel, which you've set onto a sheet pan or pans. Or place them directly onto the pan (lightly greased or parchment-lined). Cover them with a proof cover or lightly greased plastic wrap, and allow the loaves to rise till they have become quite puffy, but haven't doubled in size; this will take about 60 to 90 minutes.

Preheat your oven to 450°F; if you're using a baking stone, place it on the lowest shelf. Roll the risen baguettes from the couche onto the lightly greased or parchment-lined pan of your choice -- or onto a peel, if you're baking directly on the stone. Spritz the baguettes heavily with warm water; this will help them develop a crackly-crisp crust. Using a very sharp knife held at about a 45° angle, make three 8” vertical slashes in each baguette. Place the baguettes in the oven.

Bake the baguettes for about 25 minutes, until they're a deep, golden brown. Remove them from the oven and cool on a rack. Or, for the very crispiest baguettes, turn off the oven, crack it open about 2 inches, and allow the baguettes to cool in the oven.
Yield: Three 16” baguettes.


P.S. Expect a lot more bread posts. We Make a lot of it in this house.
...I kinda got fed up with the bread isle and stopped buying it.

Tuesday, November 9, 2010

What do table, kosher and sea have in common?

So let's talk salt. There are a bunch of varieties, the main ones being table salt, sea salt and kosher salt, but is the only difference price? I got curious so I decided to look it up.
The little blurb I got was from the Food Network and you can find the full thing here.

Essentially it says that table salt has a higher content of has lots of anti-caking elements in it (namely calcium silicate) which allows it to remain in such tiny granules. This type of salt dissolves best because of the tiny granules, making it probably best for bakers. Sea salt comes in many specific varieties since it gains some distinct flavor and coloring based on where it comes from and what sea minerals it carries with it. This salt really loses it's unique flavor when cooked or dissolved, but makes an excellent last minute garnish to add for both its texture and flavor. Kosher salt is the most effective at drawing out moisture due to its large crystalline structure, good for drying meats and other foods, and is easy to grab a pinch of during cooking because of the large flakes.

Are all 3 good to have on hand? Certainly! Are all 3 essential? Definitely not!

If nothing else, this post may at least save you from dumping all that nice sea salt from Aunt Sally into a big pot of water for boiling spaghetti!

Aproveche!
~Kai

Sunday, November 7, 2010

Chi Chi Dango!

Between two people, you figure we would post more than once a month... apparently that's not the case! I guess we are just lazy, because we have been cooking/baking quite a bit and have a stack of pictures waiting to be uploaded. It seems we just need a bit more motivation...

Coincidentally, Leah has unofficially begun a posting competition with me, and while I am not very competitive (read: extraordinarily competitive but unwilling to admit it) I think I might find myself posting more frequently.

So with this post I present to you my newest creation!

It's a specific type of mochi that I grew up eating. Traditionally mochi (for those of you that might only recognize it as a way to eat ice cream) was a Japanese treat made of cooked rice that was pounded into a sticky mess. While some people still do make it traditionally, like my good friend Cheryl, it is an incredibly laborious process and the mochi only lasts for a few days before it becomes rock hard.

That being said, there are many types of mochi and one I grew up with in Hawaii was chi chi dango. It's a coconut mochi and has a delightful chewy and sticky consistency that lasts at least a week unrefrigerated. I'm having a hard time comparing it to anything else, so you'll just have to try it yourself!

While buying a small container of this used to be really expensive, making an absurdly large amount to share with friends and family is surprisingly easy and cheap - perfect for my non-existent funds and short attention span. (oooh, something shiny!)

Without any more preamble here is the recipe:
1 lb of glutinous rice flour (you can find this in your local asian or international store. I got my pound for $0.75!)
2 1/2 cups of sugar
1 tsp baking powder
2 cups water
1 tsp vanilla extract
1 can coconut milk
potato starch for dusting

Mix together the rice flour, sugar, and baking powder. In a separate bowl mix together the water, vanilla extract and coconut milk. Whisk the rice flour mixture into the wet one and make sure it's well combined.

It will look like you really didn't do anything except pour milk into a bowl, but don't be fooled!

Now pour the concoction into a greased 9x13 pan. If you don't have a 9x13 like me, then use the largest one you have and make sure it doesn't overflow when you pour it all in (while I may not cry over spilled milk, I do over spilled coconut milk).

Cover the pan with foil, tenting it a bit in the middle (I didn't and the foil decided to adhere to the top of my mochi) and bake at 350 Fahrenheit for an hour.

When you take it out it will not look like it is done, in fact, you will be convinced that you just made a huge vat of ugly white glop. You might not be entirely off. Just make sure that the mochi doesn't have any pools of that milky liquid on top and set the pan aside to cool overnight. If you turn it out too early it will not hold it's shape and turn into some sort of goopy mess, so be patient. Do not refrigerate it, refrigerating mochi does something strange to it and makes it stiffer than it should be (in a bad way).


Now take that potato starch and dust it over the surface that you plan to cut the mochi on. I know you may be wondering where to get potato starch... I honestly don't know. I inherited my large container of the stuff along with a tacky lamp when I moved into the apartment, and since it wasn't growing anything it must still be good... right?

Take a plastic knife (if you don't happen to have one just wrap cling wrap around a butter knife) and loosen the mochi a bit, then turn over onto the starched surface. Use the knife to cut the mochi into little pieces and lightly dust each piece with potato starch. The starch keeps it from sticking to EVERYTHING, which you may have noticed that it does. Keep the dusting light though so you don't take away from the awesome flavor. I starched my hands and rubbed them over the sides just enough to make sure it didn't stick.
By the end of all of this you should have enough to share with pretty much everyone (that is if you don't scarf down all of them like I am apt to do). It keeps for about a week at room temperature, just be sure to put it in a little baggie so it doesn't dry out completely.
These can by dyed pretty colors if you have food coloring (add it to the mixture pre-baking), or could even be filled with super tasty azuki beans (sweet Japanese beans). Whether or not you end up adding a little pizazz to the chi chi dango, it's pretty darn tasty!

Itadakimasu,
~Kai

Friday, October 22, 2010

I Made a Pie!

Just for the record. I'm winning the posting contest.


Clearly from the title of the post, you know what it is going to be about.

Now the question is: what type of pie?

I'll give you a hint


That bag in my hand was full to the brim
So logistically there was only one pie to make
Apple Pie


Pies are scary.
scratch that.
Everyone says that pies (pie crust?) are scary.
While it is halloween, this would be a really pathetic attempt to scare you.

Pies aren't scary, they just take some practice and a not OCD person.
It's butter, sugar, flour, apples, and spices. Honestly, I don't care who you are, it will taste good with those ingredients.

This was my first full pie I've attempted without the watchful eye of my mom (Hi mom!). My mom may not think it, but she's a champion baker. She just kind of does it, and it works. At least that's what it looks like to me.
I on the other hand am slowly trying to achieve that kind of skill, but until then I will obsess over every recipe I can find, trying to pick the perfect one with the best tips.

I settled on Joy the Bakers version with a few additions of my own (more spices! always!!), and I chose a Pâte Brisée crust.

It. Was. Awesome.

Move over pie. You're not so scary.


All Butter Crust (double for a bottom and
top)
  • 1 1/4 cups all-purpose flour, plus extra for rolling
  • 8 Tbsp (1 stick) unsalted butter, very-cold, cut into 1/2 inch cubes
  • 1/2 teaspoon salt
  • 1 teaspoon sugar
  • 4 to 6 Tbsp ice water, very cold
Cut the sticks of butter into 1/2-inch cubes and put them in the freezer for at least 15 minutes to get them as cool as possible.

In a food processor, combine flour, salt, and sugar. Add butter and pulse a few times, until mixture is small pea size balls. Add ice cold water 1 Tablespoon at a time, pulsing until mixture just begins to clump together.

Remove dough and shape them into two discs. There should still be clear pieces of butter. This butter is key and is the reason for the delicious flakyness of the crust!
Sprinkle the disc with a little flour, wrap them in plastic wrap and refrigerated them for about an hour or more.

Remove one discs from the refrigerator, and let sit for a few minutes. Sprinkle some flour on top of the disk and roll it out with a rolling pin on a lightly floured surface to a 12 inch circle; about 1/8 of an inch thick.

Add a little flour if necessary to keep the dough from sticking. Fold the dough in half and transfer to the pie pan.

Repeat the same process for the second disc after the pie has been filled with filling.

For the Filling I used Joy the Baker's recipe. Like I said, the only change I really made was upping the spices. You can find it here.


It was a really great recipe, and I was super proud of my delicious pie!!

I can't wait for the next one!


Pie coma?


-Leah

Friday, October 1, 2010

My Birthday Cake

Ok, so we're bad at this.

The funny thing is, every time we cook something I try to take pictures. Unfortunately we cook at night when the lighting is poor, or I'll forget to take pictures during a pretty step and end up with a picture of dirty dishes instead.

...I also forget to post...

Anyways. Happy birthday to me. Let's bake a cake
.

Not just any cake, chocolate cake. Not just any chocolate cake, chocolate cake with alcohol in it.


I also put almonds in the middle.

They were wonderful.


Enjoy!

I did.

Chocolate Amaretto Cake
(adapted from Gourmet)

* 3 ounces semisweet chocolate
* 1 1/2 cups hot brewed coffee
* 3 cups sugar
* 2 1/2 cups all-purpose flour
* 1 1/2 cups unsweetened cocoa powder (not Dutch process)
* 2 teaspoons baking soda
* 3/4 teaspoon baking powder
* 1 1/4 teaspoons salt
* 3 large eggs
* 3/4 cup vegetable oil
* 1 cup well-shaken buttermilk
* 1/2 cup amaretto
* 3/4 teaspoon vanilla

To make the cake
Preheat oven to 300°F. and grease two 10-inch cake pans ( made it in two 9 inch and had a little mini cake too). Line bottoms with rounds of wax paper and grease paper.

Finely chop chocolate and in a bowl combine with hot coffee. Let mixture stand, stirring occasionally, until chocolate is melted and mixture is smooth.

Into a large bowl sift together sugar, flour, cocoa powder, baking soda, baking powder, and salt.
In another large bowl with an electric mixer beat eggs until thickened slightly.
Slowly add oil, buttermilk, vanilla, and melted chocolate mixture to eggs, beating until combined well.
Add sugar mixture and beat on medium speed until just combined well.
Divide batter between pans and bake in middle of oven until a tester inserted in center comes out clean, 1 hour to 1 hour and 10 minutes.


Amaretto Whipped Cream Frosting

* 1 Pint Heavy Cream
* 1 Tsp Sugar
* 1 Glog of vanilla
* Amaretto (as much as you please)

Put all ingredients in a chilled bowl and mix with a hand mixer or a whisk (poor you...) until whipped cream is formed.


This cake was REALLY good, and I'm not saying that because I made it. I plan on using this chocolate cake recipe until someone forces me to use another one (sorry mom).


Clearly even the batter was good


Happy cooking (or baking)

Leah

Tuesday, August 24, 2010

Scallion Pancakes

Ok… I’m on a carb kick. Let’s face it, who doesn’t love carbs? I promise I will try to tone it down a bit, but for now let’s just revel in the awesome glory of carbohydrates.

Done yet? (Me neither)

So a while back I had a potluck with a bunch of friends and, as oft happens with college kids who have no budget, we ended up with tons of rice and pasta dishes… There was one particular dish that caught my attention though; delicious scallion pancakes! Now I grew up eating authentic Chinese food once in a while, but for whatever reason I can’t remember really having these. Boy, I missed out!

My friend sent me the recipe he used, from Appetite for China. The trick he has is to sub in baking powder for the yeast to avoid the long process of letting dough rise. Once that additional 40+ minutes are removed from the process, making these are a cinch!

These are not your breakfast type of pancakes; this is a sort of tasty appetizer that pairs the striking green bite of scallions with a crisped doughy form that just calls for a bit of soy-sauce drizzled on top! Alright, rambling again…

Scallion Pancakes

1 1/2 Cups all-purpose flour

½ Cup water

½ Cup boiling water

1 ½ Teaspoons baking powder

1 Teaspoon salt

2 Tablespoons vegetable oil

1 Cup finely chopped scallions

Sift together your flour, and salt in a bowl. Pour in your boiling water (it is supposed to kinda cook some of the dough a bit) and mix a bit, then add the rest of the water to start making a dough. You want a rough dough so if it is a bit too mushy add flour very gradually (conversely, add water if it hasn’t really formed a dough). Mix in your oil and give it a quick knead.

Roll out your dough on a floured surface, probably taking balls of dough a little smaller than a baseball. Roll it out pretty thin (about a ¼ inch) and sprinkle with chopped scallions.


1st appearance of a wine bottle as a rolling pin on this blog!

You then roll it up like a carpet so that all the beauteous scallions are inside the roll. Coil like a cinnamon bun (yumm...) and roll till 1/3 inch thick.

Now heat up a non-stick skillet on medium with a little bit of oil and fry these suckers up!

When they start getting that beautiful brown flip em over for a bit and serve fresh off the skillet topped off with a splash of soy-sauce!

Bon appetit!

~Kai


Tuesday, August 17, 2010

I had one of those moments.
I placed wonderful ingredients together, and created something fantastically delicious...by mistake.
That just gave me the image in Ratatouille when he's explaining the magic of combining foods and the visual is just exploding fireworks.

Anyways, I was trying to just use up ingredients, and thanks to my mom and her fabulous garden I had fresh tomato and cucumber. I also had a mini pita pocket.
Generally my goal with pita pockets is to shove as much stuff in them as physically possible. It's a fun game. Try it.

Tomato and cucumber are boring on their own. Brie cheese is not boring. Melted brie cheese is definintely not boring.

Result?
an amazingly melted brie, tomato and cucumber pita pocket. Yes, it is simple, but that was the beauty of it.

It's easy, it's delicious, it's warm, and it uses up the leftover food in my fridge preventing me from having to buy more food.
Win.


Unfortunately, I didn't realize how great my creation was until I was a few bits in. The result was some mediocre pictures.


I'll get better at this some day.


-Leah