Thursday, December 30, 2010

Hawaiian Haupia


Recently I’ve been feeling a little nostalgic for home. For whatever reason, the chilled and snowy landscape of Massachusetts hasn’t been satisfying my longings for Hawaii. Strange, I know. To fight off the blues, I decided to make a dessert from home for a recent potluck we’ve hosted. The dish happens to be a coconut gelatin called haupia. It is the sort of thing that you don’t generally eat a ton of in one sitting, but is found at every luau or Hawaiian food place. If you don’t like coconut or jello, stay away. However, if you love coconut in any shape or form like I do, then this is an easy must try.

The recipe makes 20 small servings, takes 5 ingredients and only about 15 minutes of active time.


1 can of coconut milk

1 cup of milk

1 cup of sugar

1 cup of water

½ cup of cornstarch


Start off by heating the coconut milk, milk and sugar together in a large saucepan until all the sugar dissolves and

the mixture is fairly hot.

In a small bowl mix the water with the cornstarch. The cornstarch will keep settling on the bottom, so you will have to mix it frequently. I suggest trying to mix it with your hand, because it does this strange thing where it becomes texturally REALLY interesting…

Back to the recipe- While stirring furiously, add the dissolved cornstarch and water into your saucepan. Crank the heat up if necessary to get the mixture to that point JUST short of boiling and continue to stir as if your life depended on it. The coconut goop will start to thicken, but keep going until the surface begins to hold its shape (when the stirred part stays raised instead of melding back into a solid surface of white).


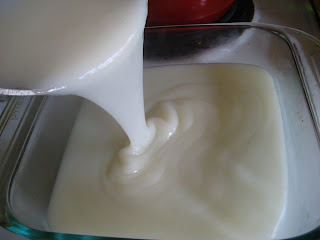
At this point you can give your wrist a break, remove the concoction from heat and hunt down a dish to let it set in. Depending on how thick you want your cubes I would recommend an 8x8 or even a bit smaller. When you have the dish picked out, go ahead and pour the mixture in as evenly as you can.

Pop the dish into the refrigerator for at least an hour, cut into small cubes and serve!


Yes, that easy. I suggest keeping the haupia chilled until you are about ready to serve, but the whole thing should keep for a week if covered well.

E'ai ka-kou!

~ Kai

Thursday, December 16, 2010

Failgels or The Case of the Mushy Bagels

November wasn't my proudest of baking months. For whatever reason, I fell into a slump of botched baking experiments. They all had such great potential, but really seemed to end up a disaster... My bagels in particular were a terrible disaster. They tasted right and looked pretty, but something happened to the holes and the dough around that center part remained mushy, despite repeated baking and even attempts at toasting it dry. It wasn't even that the dough was uncooked- it became actual MUSH. You may ask why I am posting a failed recipe... well it's because I think I figured out what might have gone wrong, and I want to put the challenge out to you to try the altered recipe and discover if the recipe turned out as great as I hoped it would. Also, I took really pretty pictures of the process and I want to post them!

The actual bagels came out prettier once baked, but I forgot to snag a picture of them once they came out... Oops!

The recipe is a (now) modified version of one I found on Allrecipes. I made a whole wheat version, added my own topping, and cut back on the boiling time. You can find the original here.

Makes approximately 12 smaller bagels or 8-9 larger ones.

2 1/4 cups all purpose flour
2 cups whole wheat flour
2 packets of instant-dry yeast (or just dump in 2 tablespoons and a bit like me!)
1 1/2 cups of warm water
3 tablespoons of sugar
1 tablespoon of salt
and either 1 tablespoon of sugar or 3 tablespoons of baking soda.
3 tablespoons of onion flakes
1 tablespoon of dried garlic powder
3 tablespoons of toasted sesame seeds
1/2 a tablespoon of salt

First, like all yeast-tastic doughs, we start with activating the yeast. The recipe here is unusual in that instead of activating the yeast with the water, then adding it to the dry ingredients, you first mix 1 1/2 cups of all purpose flour with the yeast. Also mix separately the water, sugar and salt, then add it to the dry ingredients and mix thoroughly for a bit.

Start mixing in the rest of your flour gradually, until you have a somewhat stiff dough. Flour a clean surface lightly and knead that sucker for about 10 minutes. Cover it up and let it rest for 15 minutes.
When that's done, divide up the dough into however many bagels you want to make. Shape each into a ball, then poke your finger through the middle and slowly enlarge the hole. I recommend a larger opening than you think reasonable, because it will rise and you don't want that space to close back up! Cover the bagels up and let rise for 20 minutes.

You should now start up a big boiling pot of water, though there's no need to fill it really high. Add either the sugar or baking soda (depending on what you decided on) to the water. Now some of you may find it odd to boil the bagels, but it's the process it undergoes when getting boiled that gives it that super crispy crust you love about bagels. Let's not jump the gun however, first broil those bad boys at 450 for just a minute or two on each side. NOW toss em into the water in small groups and allow to sit at a simmer for just about 1 minute then take em out and lightly pat em dry.

I am a sucker for everything bagels, so go ahead and mix those last ingredients together (or whatever you want to top your bagels with) and sprinkle generously on top of the bagels. You can even go ahead and give it a light pat to make sure it sticks nicely to the gelatinous feeling dough (if you've ever made bagels or pretzels before, you know what I'm talking about).

Lightly grease a baking sheet and bake at 375 (oh yeah, you should probably preheat the oven) for about 35 minutes, flipping half way in-between. At this point they should be looking amazing, and with any luck they won't have the consistency of dumplings in the center!

Es gezunterheyt!
~Kai

P.S. If you are brave enough to try this, please let me know how it turned out!

Sunday, December 5, 2010

Baby It’s Cold Outside

BRRRRRRRR

IMG_0963

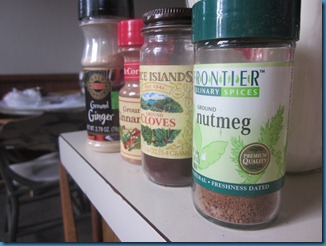
These spices mean business

The temperature dropped. I suppose it is December, but I just realized I’m not ready for it to be dark and cold.

Besides cold December means one thing: Finals.

It means spending Friday nights in the library instead of relaxing, trying to find new ways to remain productive, running through the library to get rid of restlessness, and a great reason to try cooking more.

So when I woke up this morning I realized that I was cold and did not want to start writing my paper.

Solution? See those spices?

Baked comfort, er…oatmeal.

It tastes best wrapped in a blanket as the steam hits you in the face.

Fact.

Baked Blueberry Banana Oatmeal

Adapted from Seven Spoons

Ingredients
2 cups large flake rolled oats (not instant)
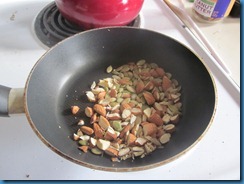
1/2 cup sliced almonds, lightly toasted
1/3 cup brown sugar, packed
1/4 cup pumpkin seeds, lightly toasted
2 teaspoons flax seeds
1 teaspoon baking powder
1 teaspoon ground cinnamon
1/4 teaspoon ground ginger
1/8 teaspoon ground nutmeg
1/8 teaspoon ground clove
1/8 teaspoon kosher salt
2 cups milk

1 large egg
2 tablespoons unsalted butter, melted
1 teaspoon vanilla
1 teaspoon pure maple syrup
1 medium banana, mashed
1 cup frozen blueberries (not thawed)

Preheat oven to 375°F . Grease a 8x8 baking dish.

IMG_0958

In a medium bowl, mix together the oats, almonds, brown sugar, pumpkin seeds, flax seeds, baking powder, spices and salt.

IMG_0964

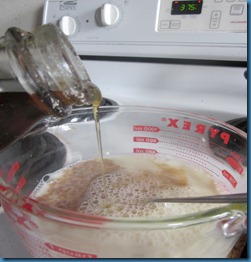
In another bowl, whisk together the milk, egg, banana, vanilla and maple syrup.

In the prepared baking dish, scatter the blueberries and pile the oat mixture to cover the fruit, but do not pack too tightly. Carefully pour the wet milk mixture over the oats.

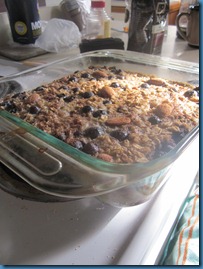
Bake for 35-40 minutes, until the oatmeal is puffed and set, with a golden brown top.

Makes about 4 big servings.

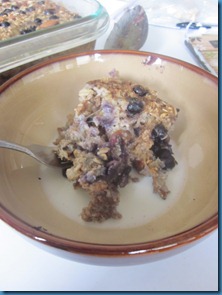
IMG_0976It’s really great with a bit of milk and a drizzle more maple syrup. I’m sure you can substitute any seeds or fruit that you have on hand as well.

IMG_0983

mmm warmth.

Damn….back to work

Leah