Sunday, January 13, 2013

Peanut Butter Oatmeal Chocolate Chip Cookies


I am shocked. Shocked!

September? September?!  Whoops?

Another problem – I went on my blog (which has turned into my own personal recipe bank) to look up a cookie recipe, and I had never written about it! Shocked! So much disappointment is happening right now!

I feel like this post is that awkward conversation you have with someone you haven’t talked to in a while. You know the one where you try to squeeze everything you’ve done in the past year into one sentence to make it seem like it hasn’t been so long? “Yeah I got a a raise, new pet catnamedSally, family’sdoingjustfine, ohImovedacrossthecountry andamnowengaged.”

Got that? P.S. none of that happened to me, I just haven’t posted in THREE MONTHS.

How was your holiday? New years? Any good resolutions? Given them up yet?

Good? Alright. Now that that’s out of the way, let’s get down to the cookies I originally went searching for.

I found these cookies on my never ending hunt to not do the same-old-same-old chocolate chip cookies.

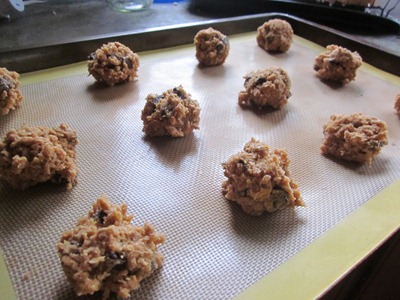
 IMG_2409

Honestly, I probably was low on flour too, and flourless cookies are…ehhhh. Lucky for me a found a solid ingredient list:

  • Oats replacing flour– check
  • Peanut butter- !! peanut butter (like bacon) makes everything better – check
  • Chocolate – duh - check

***p.s. peanut butter AND bacon together will rock your socks (dirty socks if you’re ke$ha) example: awesome


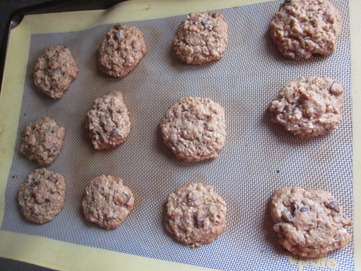
IMG_2411

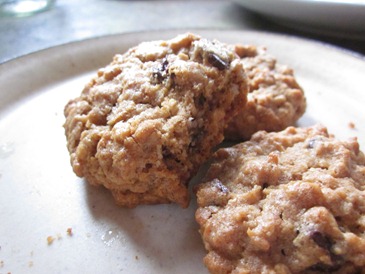
The end creation is a thick, slightly peanut buttery, ever so chewy, full bodied cookie. It’s a souped up chocolate chip cookie. So good.

IMG_2416

Give it a shot. I’m going to go bake them now.

I won’t leave you for so long next time. I have homemade oreos to share, and DYI yogurt. I can’t hog these things for myself for much longer!

IMG_2422

Chunky Peanut Butter and Oatmeal Chocolate Chipsters
From Baking, From My Home to Yours, by Dorie Greenspan – (fantastic baking book  btw)

Makes ~ 60 cookies (yikes)

~3 cups old fashioned oats
~1 cup all purpose flour
~1 tsp baking soda
~2 tsp ground cinnamon
~1/4 tsp freshly ground nutmeg
~1/4 tsp salt
~2 sticks (8 ounces) unsalted butter, at room temperature
~1 cup peanut butter--chunky  or smooth (she says not natural PB, but I don’t buy not natural so…it works)
~1 cup sugar
~1 cup (packed) light brown sugar
~2 large eggs
~1 tsp pure vanilla extract
~9 ounces bittersweet chocolate, chopped into chunks, or 1 1/2 cups store-bought chocolate chips or chunks

We’re doing the cookie thing.

Preheat the oven to 350 and prepare a few baking sheets with silicone mats or parchment…or nothing and be crazy!

Whisk oats, flour, baking soda, spices and salt

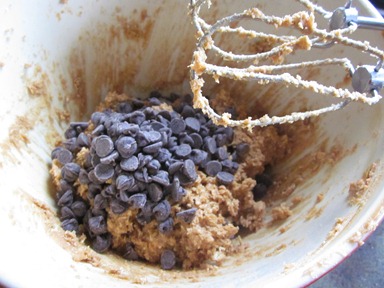
In a stand mixer or a bowl, beat butter, peanut butter and brown sugar on medium speed until smooth and creamy. Add the eggs one at a time, beating for a minute after each egg. Add in vanilla. Slowly add in dry ingredients, mixing only until just blended. Mix in chocolate and nuts by hand.

Drop dough by rounded tablespoonfuls 2 inches apart on the baking sheets. Bake for 13-15 minutes. Dorie recommends rotating sheets part way through. When done, cookies should be golden and firm around the edges.

Ohmygod delicious.

Annnnd Go!


IMG_2436

IMG_2442


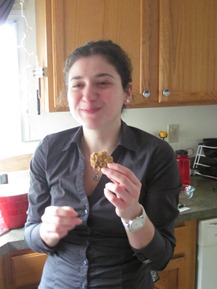
Oh. Also. I found this magical photo shoot I had with Suela while she was eating the cookies. Wonderful!

<3 you all! (especially my mom because she’ll be the first one to find this post )

~Leah
Sunday, September 2, 2012

Pina Colada Boozesicle


Tomorrow is Labor Day. Allow me to make you a list of the positives and negatives

Negatives

  1. I can’t wear white shorts any more (Considering I’ve already gotten them dirty, this may not be a problem Also – let’s be honest, no one cares)
  2. The sun will now set before I leave work, which will cause me to cry every night
  3. My commute will now take 2x longer
  4. I have to find my jacket
  5. My perpetually cold hands will no longer feel refreshing
  6. Summer is “over”

Positives

  1. APPLES

…that’s all I’ve got.

However! Thanks to climate change, who knows when the summer will really end?

So to enable the continuation of your summer fun, I give you:

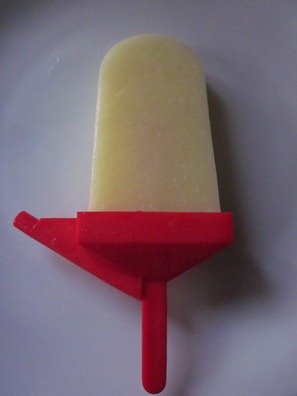
The Boozesicle

IMG_2835

One part popsicle

One Two part alcohol

100% delicious


I really don’t think I need to put much of a plug in for these. It’s alcoholic childhood. If you like pina coladas, but not getting caught in the rain, you should just make these. Even if you  like getting caught in the rain. Make these. Then stand in rain with popsicle.

Labor Day BBQ? You’ll be a big hit. Because sometimes life needs some alcohol in your popsicle.

Get to it.

IMG_2818

Pina Colada Boozesicle

Adapted from Shutterbean

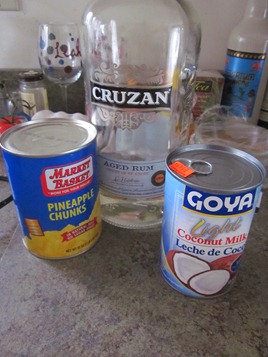
Ingredients

  • 3 cups chopped fresh pineapple (I used canned. It was fine.)
  • 1/3 cup well-shaken canned unsweetened coconut milk
  • 1/2 cup water
  • 3 tablespoons superfine granulated sugar
  • 1/3 cup light rum (let’s be honest. I splashed more than this in)

IMG_2819

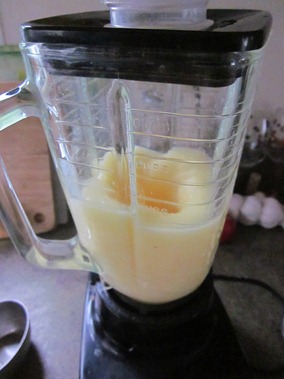
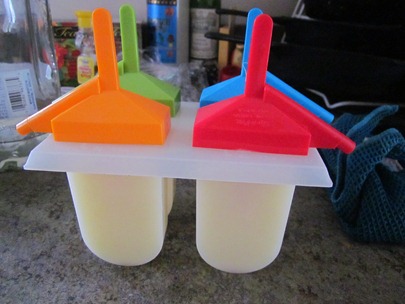
Put all ingredients into a blender and blend until delicious. Pour mixture into popsicle molds, and  freeze until firm, about 24 hours.

IMG_2822

Easy right?

IMG_2837

Happy popsicle freezing!

~Leah

p.s. don’t drip popsicle juice on your white shorts.

Saturday, September 1, 2012

BACON Peanut Butter Cookies


I put bacon in cookies. I put bacon in peanut butter cookies.
IMG_2783IMG_2787IMG_2790
They were awesome.
Have you gone to the store to buy bacon yet? I can wait. IMG_2788
So normally I don’t really do bacon. See this post for why. But for something as intriguing as bacon cookies? I will buy the most human bacon I can find just to experience this peculiar sounding combination. The results?
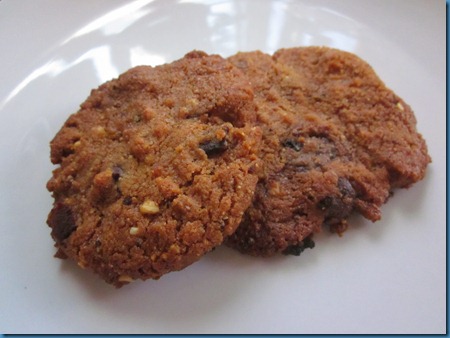
Salty, sweet, peanut butter, delicious.
It was funny to see people’s reactions. When I first  proposed the idea to Suela, she texted me back with something a long the lines of “oh…well that could be okay, but I’m not sure about that…” When I  plopped the container of cookies down at the party I had made them for reactions were similar. People’s eyes seem to light up at the mention of bacon, but then you could see the confusion after the words “cookie” and “peanut butter” were linked to them. Yet after the party, I had already shared the source of the recipe multiple times. Total success.
These also may be the most expensive cookies I’ve ever made…
Still worth it.
They’re not even that bad for you! Not that I checked…I totally checked. I had to check.
Regardless! If you want to freak you friends and your taste buds out, in a good way of course, give these things a shot.
Bonus points – breakfast cookie! Do it. Be a champion.

Peanut Butter Bacon Cookies

Adapted from Shutterbean
Ingredients
  • 1 cup all-natural chunky or smooth peanut butter
  • 1/2 cup granulated sugar
  • 1/2 cup brown sugar
  • 1 egg
  • 1 teaspoon baking soda
  • 1 teaspoon vanilla
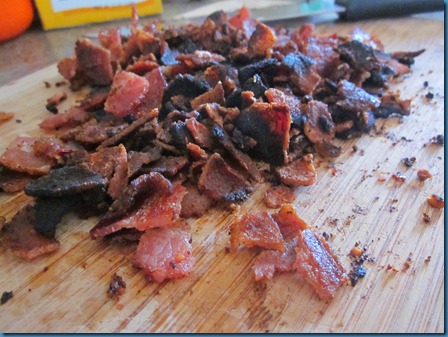
  • ~ 6 slices of bacon, cooked, cooled and diced
  • Chocolate chips (optional but AMazing)
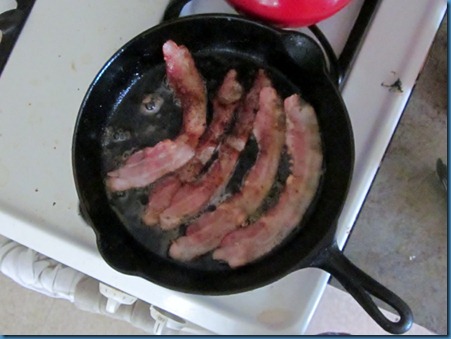
Fry up that bacon!
Preheat oven to 350 degrees F.
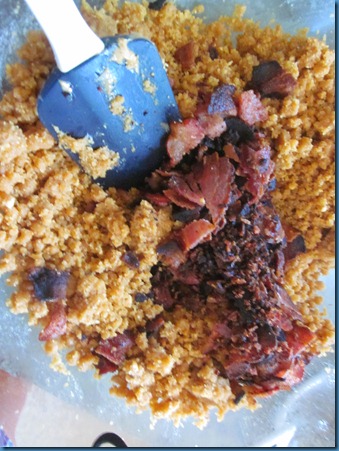
Using a mixer, combine peanut butter and sugars until well combined.  Add in  the egg and baking soda and mix for about 2 minutes. Carefully fold in cooked bacon and chocolate into dough. Roll heaping tablespoon sized balls of dough, and place on a parchment lined cookie sheet.  Flatten balls with a fork in a criss-cross pattern. Careful – I found the cookies to crack easily like this! 
Bake for roughly 10 minutes, until lightly browned.
Cool and consume!
The one thing I didn’t love about this recipe is that I found the cookie to be quite crumbly. I think if I did it again, I may experiment with a peanut butter cookie recipe that has flour it in. It may work, it may not. I guarantee it will still be delicious. I mean…it’s bacon.


Tuesday, June 12, 2012

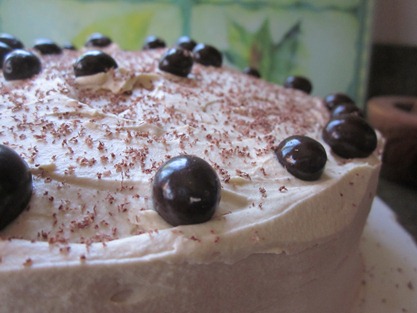
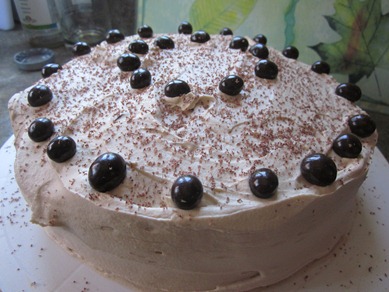
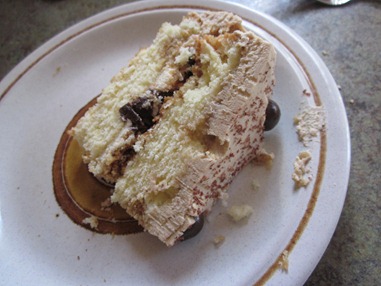
Mom’s Tiramisu Birthday Cake


IMG_2670

Can we talk for a second? Who are those people that manage to get their cameras out just at the right moment to get all of those perfect “we’re having so much fun!” pictures? Do they just permanently have a camera attached to their hands? Do they get to partake in the fun, or are they too busy trying to take pictures? I’m awful at taking pictures (surprise surprise). I forget! Why would I want to be fumbling with my camera if I could be in the action.

That being said…it would really have been nice to be fumbling with a camera and to have proof that we celebrated my mom’s birthday. Instead, all I have is a few pretty pictures of her lovely cake. That I baked. Yes I just complimented myself. Deal with it.

There are so many wonderful things I could write about my mom.

For one, I know that no matter what, I will at least have one person reading this blog, and that’s her. Actually it’s a bit scary how quickly she catches on to whether I’ve posted…because I do it so amazingly infrequently. Mom senses. That’s how. Hi Mom!

My mom is probably about 80% of the reason I bake (The other 20% being my sweet tooth…)She was always so good at it! And like most things my mom is good at, she made it look so simple. When you tell her how good she is, she just shrugs it off like everyone can do what she does. Not true Mom, not true!

Anyways, I’ve been eyeing this  cake for a long time, waiting for the right person to make it for. My mom is a coffee lover, Italy lover (I really wanted to write Italian lover), and a cake lover (duh). Plus she’s my mom, so she deserves an awesome cake. Sounds good to me.

So I made this Tiramisu cake for my mom. The one who taught me and inspired me to bake, and garden, and clean with an 80/20 attitude (more like 50/50 sometimes), and forced me to eat salad every night.

Perfect.

This cake uses fancy ingredients like mascarpone cheese and instant espresso. Never fear. It’s just expensive cream cheese. The cake is light, but soaked with alcohol. If that doesn’t say birthday, I don’t know what does. I would highly recommend if you plan on serving it a day or so after you bake it, soak it the day you make it. That will keep it from drying out a bit – my one flaw this time.

Still delicious.

Love you mom! Happy birthday!

Tiramisu Cake

From Smitten Kitchen

IMG_2665


For the cake layers:
2 cups cake flour
2 teaspoons baking powder
1/8 teaspoon baking soda
1/4 teaspoon salt
1 1/4 sticks (10 tablespoons) unsalted butter, room temperature
1 cup sugar
3 large eggs
1 large egg yolk
1 1/2 teaspoons pure vanilla extract
3/4 cup buttermilk

For the espresso extract:
2 tablespoons instant espresso powder
2 tablespoons boiling water

For the espresso syrup:
1/2 cup water
1/3 cup sugar
1 tablespoon amaretto, Kahlua, or brandy

For the filling and frosting:
1 8-ounce container mascarpone
1/2 cup confectioners’ sugar, sifted
1 1/2 teaspoons pure vanilla extract
1 tablespoon amaretto, Kahlua, or brandy
1 cup cold heavy cream
2 1/2 ounces bittersweet or semisweet chocolate, finely chopped, or about 1/2 cup store-bought mini chocolate chips

Chocolate-covered espresso beans, for decoration (optional)
Cocoa powder, for dusting

Making the Cake

Preheat oven to 350 degrees. Grease and flour two 9 in round cake pans.

Sift together flour, baking powder, baking soda, and salt

In a separate bowl, beat the butter until soft and creamy. Add the sugar and beat for approximately 3 minutes. Add eggs one at a time ending with the yolk, beating about a minute each after ever addition. Mix in vanilla. On a low speed, mix in dry ingredients alternately with the buttermilk, making sure to start and end with the dry ingredients. Mix only until the ingredients disappear.

Divide the batter evenly between the two pans and smooth the tops with a rubber spatula.

Bake cake for 28 to 30 minutes, rotating the pans at the midway point. Cakes are done when golden and springy. Transfer cakes to a rack and cool for about 5 minutes before removing from pans.

Making the Espresso extract

Stir the espresso powder and boiling water together in a small cup until blended

Making the Espresso syrup

Stir the water and sugar together in a small saucepan and bring just to a boil. Pour the syrup into a small bowl and stir in 1 tablespoon of the espresso extract and the liqueur.

Making the Filling/Frosting

Whisk mascarpone, sugar, vanilla, and liquor in a large bowl until smooth.

Whip heavy cream with a hand mixer until it holds firm peaks. With a rubber spatula stir about 1/4 of the whipped cream into the mascarpone. Gently fold the rest of whipped cream.

To Assemble the Cake

Place one layer right-side up on serving dish. Using a pastry brush or a small spoon, soak the layer with about one third of the espresso syrup. Smooth some of the mascarpone cream over the layer – user about 1 1/4 cups – and gently press the chopped chocolate into the filling. Put the second cake layer on the counter and soak the top of it with half the remaining espresso syrup, then turn the layer over and position it, soaked side down, over the filling. Soak the top of the cake with the remaining syrup.

For the frosting, whisk 1 to 1 1/2 tablespoons of the remaining espresso extract into the remaining mascarpone filling. Taste the frosting as you go to decide how much extract you want to add. 

Smooth the frosting around the sides of the cake and over the top. Decorate with Espresso beans.

Refrigerate the cake for at least 3 hours (or for up to 1 day) before serving.

IMG_2701

Saturday, March 17, 2012

Homemade Irish Cream/ Magical Cheese Soda Bread


I apologize for the pictures. Some things are too good for good pictures. Sometimes I’m just lazy. I thought it was more important to share the recipes than to worry about looking good (and I was late…)

It’s St. Patrick’s Day. You should make both of these things. They will be delicious, and easy, and just do it.


Cheddar Soda Bread

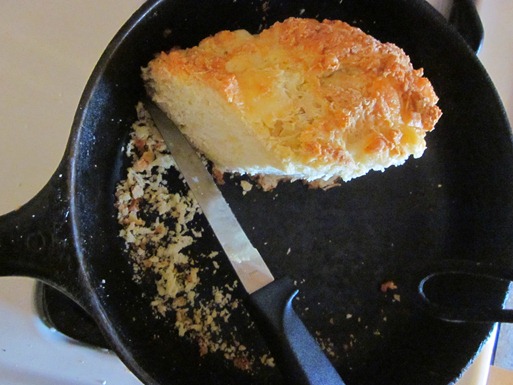
This bread has pockets of cheese in it. POCKETS of cheese!

Ok quick side note. My roommate Suela has this face she makes when she’s experiencing utter food bliss. It’s like half the reason I bake for her. She’ll first breath in the sent of the baked good and get this huge grin on her face. Then she takes a bite, and if I’ve done my job, she’ll breathe out, and literally her whole body exudes food bliss. It’s hilarious to watch. Being the ultra cheese lover she is, this bread was for her.

It’s absurdly easy. I made it…with a few drinks in me. And it was flawless.

IMG_2493

This picture sucks, but the recipe does not


Ingredients

  • 2 1/2 cups All purpose flour
  • 2 teaspoons baking powder
  • 1 teaspoon baking soda
  • 1/2 teaspoon salt
  • 4 tablespoons cold unsalted butter (Cabot preferred), cut into pats
  • 8 ounces Cabot sharp or extra-sharp cheddar, grated; about 2 cups, lightly packed
  • 1 1/4 cups buttermilk* (or milk heated up slighly, mixed with a Tbs of lemon juice or vinegar)
  • 1 large egg
  •  

    Directions

    1) Preheat the oven to 375°F. Lightly grease 9" round pan, caste iron skillet, or just really any pan you have...

    2) In a large bowl, whisk together the flour, baking powder, baking soda, and salt.

    3) Add the butter, working it into the flour until the mixture is crumbly. Toss in the grated cheese.

    4) Mix the buttermilk and egg, and add to the dry ingredients, stirring just until everything is moistened.

    5) Scoop the dough into the pan, in as much of a ball shape as you can. Dough will be VERY sticky.

    6) Bake the bread for 40 to 45 minutes, until a cake tester inserted into the center comes out clean. Its internal temperature at the center will be close to 200°F.

    7) Remove the bread from the oven, and loosen the edges with a table knife. Wait 5 minutes, then gently turn it out onto a rack to cool. It's tempting, but wait about 20 minutes before cutting the bread, if you can; it's a bit crumbly when hot.


    Irish Cream (Homemade Bailey’s)

    OH my god. They are ripping all of us off. Not only is making you own Irish cream cheaper (MUCH cheaper), it’s stronger and far more delicious. Also, so so so very simple!!

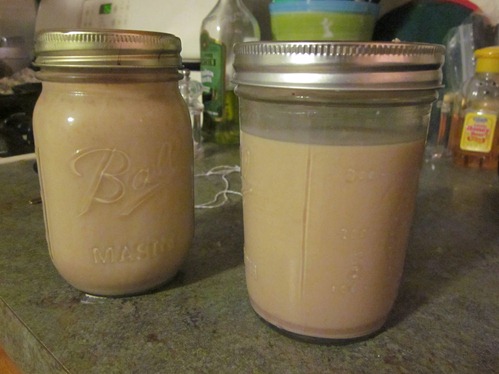
    IMG_2495


    Ingredients (makes 4 cups)

    • 1 C heavy cream
    • 14 oz. sweetened condensed milk***
    • 1 1/3 C Irish whiskey (I used Jameson)
    • 2 T chocolate syrup
    • 1 t instant coffee (I used instant espresso because that’s what I had)
    • 1 t vanilla extract
    • 1 t almond extract (I didn’t use)

    ***Find in the baking section in a small can. Watch out! Evaporated milk comes in the same type of can and it is VERY different!

    Wanna see how easy this is?

    Mix all ingredients in a blender.

    Enjoy.


    Holy crap. so good


    Happy St. Patty’s!

    Leah