Saturday, November 20, 2010

Hearty Tomato and Dumpling Soup

Check it out. It didn’t take two months for me to post.

I’m getting good at this.

Also, I really hope that one day I look back at these blog posts and realize how BAD my pictures were, as in, I get BETTER.

(one can dream)

clip_image002

People always talk about chicken and dumplings.

I have no idea what that is. I never ate it as a kid…or a teen…or a college student.

To be honest, the concept of dumplings kinda confuses me, especially because the first time that I looked up what they were, the recipe literally said flour, salt, water.

????

However, I did find this awesome looking recipe on A Cozy Kitchen for Tomato soup with herb dumplings. Cute blog, good recipes, check it out.

But this soup caught my attention for a few reasons

· I had everything just lying around for it (major plus)

· It incorporated chickpeas (protein is always good)

· The dumplings contained WAY more than just flour (cheese and herbs!!!)

I played with the recipe a bit by adding more spices and some chard that we had from our CSA.

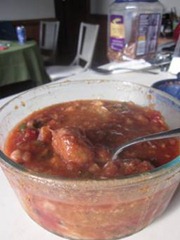
The end result was a pretty good tasting soup, but I learned I know NOTHING about dumplings.

In fact they turned out kinda like mushy balls of herby cheese flour. If you poke them too hard they disintegrate into the soup...which made it thicker….I guess that’s a plus?

What did I do wrong?

Maybe you know?

Anyways, it’s filling and tastes good, but next time I either need to figure out what this dumpling deal is or just stick to my usual piece of bread with soup.

Hearty Tomato and Herb Dumpling Soup

Adapted from the Cozy Kitchen

Soup
1 tablespoon olive oil
1 small onion, chopped
2 cloves garlic, crushed
½ teaspoon ground coriander
2 teaspoon cumin
1 teaspoon chili powder
1 can chickpeas, drained and rinsed
1 ¾ cup vegetable stock
1 14oz can chopped tomatoes

1 cup chopped chard (optional)

Dumplings
1 cup all purpose flour (I used half whole wheat)
1 ½ teaspoons baking powder
½ teaspoon salt
2 tablespoons butter, chopped
2 tablespoons grated Parmesan cheese
2 tablespoons chopped fresh herbs ( Thyme, Chives, Rosemary, your choice)
3 tablespoons water

clip_image004

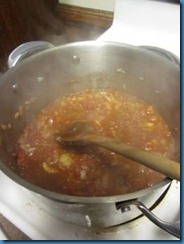
Heat the oil over medium-high heat in a large saucepan and sauté the onion for 2-3 minutes or until soft. Add the garlic, cumin, coriander and chili powder and cook for 1 minute. Add the stock and tomatoes and blend with an immersion blender (or anything that blends, I used a food processor and only blended half to keep some of the chunkyness)

clip_image006clip_image008

Stir in the chickpeas and bring to a boil. Once it boils reduce the heat and simmer, covered, for 10 minutes.

clip_image010clip_image012

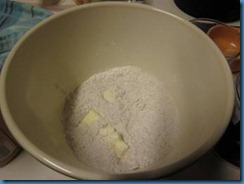
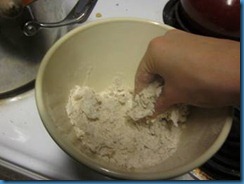
To make the dumplings, sift together the flour, baking powder and salt. Add in the chopped butter and knead with your fingers until the mixture starts to resemble fine bread crumbs. Stir in the cheese and herbs, and then make a well in the center of the mixture. Add in the water and mix together

Divide the dough into 8 portions and roll into small balls. Add the dumplings to the soup, cover and simmer for 20 more minutes.

clip_image014

If you know anything about dumplings, I’d suggest trying it out! I loved the idea but I would have liked a better result.


Happy cooking!

Leah
Sunday, November 14, 2010

Baguettes


Bread is wonderful.

Not that stuff you get presliced from the grocery store where you have to stare about about 80 different kinds and try to choose which one is right for you.

Really...what's the difference between Multi-grain, hearty grain, and healthy grain mix???

I'm talking about fresh from the oven, flavorful, crusty deliciousness.

Unfortunately... I had no idea how to create that.
Until now


About two months ago, we hosted a wine and cheese party (...just to give you an idea of how behind in posting I am).
I figured that would be the perfect time to try to tackle this tasty mystery.


(definitely still in my pajamas there...it had to rise a while)


It turns out the key to a good hard crust on bread is to spray it with water when it goes in the oven, or create steam by putting ice cubes in the bottom of your hot oven.

The recipe I used was from King Arthur Flour's baking blog.


It was an overnight dough that used a tiny amount of yeast and a long rising time

The blog give a great detailed description of the process which made everything significantly easier.
While my bread didn't come out beautiful, it did have a nice crisp to it, and we ate all three baguettes in the course of the party.


I'd call that a success.


Bread is wonderful....
Try it.


Baguettes
(From King Arthur.com)

Starter
1/2 cup (4 ounces) cool water
1 cup (4 1/4 ounces) King Arthur Unbleached All-Purpose Flour or Unbleached Bread Flour
1/16 teaspoon instant yeast

Dough
All of the starter
r 1 teaspoon active dry yeast
1 cup (8 ounces) lukewarm water*
3 1/2 cups (14 3/4 ounces) King Arthur Unbleached All-Purpose Flour or Unbleached Bread Flour*
1 1/2 teaspoons salt

*If you use bread flour, increase the water to 1 cup + 2 tablespoons (9 ounces).

The Starter: Mix the starter ingredients together till smooth, cover, and let rest at room temperature for about 14 hours; overnight is good.

Preparing the Dough: Mix the yeast with the lukewarm water. Combine the starter, yeast, water, flour, and salt, and mix and knead them together till you've made a soft, somewhat smooth dough; it should be cohesive, but the surface should still be a bit rough. Allow the dough to rise, covered with lightly greased plastic wrap, for 3 hours, gently deflating it and turning it over after 1 hour, and then again after 2 hours.

Turn the dough out onto a lightly greased or floured work surface. Divide the dough into three pieces. Shape each piece into a rough, slightly flattened oval, cover with greased plastic wrap, and let rest for 15 minutes.

Working with one piece of dough at a time, fold the dough in half lengthwise, and seal the edges with the heel or edge of your hand. Flatten it slightly, and fold and seal again. With the seam-side down, cup your fingers and gently roll the dough into a 15" log . Place the logs in the folds of a floured couche or floured cotton dish towel, which you've set onto a sheet pan or pans. Or place them directly onto the pan (lightly greased or parchment-lined). Cover them with a proof cover or lightly greased plastic wrap, and allow the loaves to rise till they have become quite puffy, but haven't doubled in size; this will take about 60 to 90 minutes.

Preheat your oven to 450°F; if you're using a baking stone, place it on the lowest shelf. Roll the risen baguettes from the couche onto the lightly greased or parchment-lined pan of your choice -- or onto a peel, if you're baking directly on the stone. Spritz the baguettes heavily with warm water; this will help them develop a crackly-crisp crust. Using a very sharp knife held at about a 45° angle, make three 8” vertical slashes in each baguette. Place the baguettes in the oven.

Bake the baguettes for about 25 minutes, until they're a deep, golden brown. Remove them from the oven and cool on a rack. Or, for the very crispiest baguettes, turn off the oven, crack it open about 2 inches, and allow the baguettes to cool in the oven.
Yield: Three 16” baguettes.


P.S. Expect a lot more bread posts. We Make a lot of it in this house.
...I kinda got fed up with the bread isle and stopped buying it.

Tuesday, November 9, 2010

What do table, kosher and sea have in common?

So let's talk salt. There are a bunch of varieties, the main ones being table salt, sea salt and kosher salt, but is the only difference price? I got curious so I decided to look it up.
The little blurb I got was from the Food Network and you can find the full thing here.

Essentially it says that table salt has a higher content of has lots of anti-caking elements in it (namely calcium silicate) which allows it to remain in such tiny granules. This type of salt dissolves best because of the tiny granules, making it probably best for bakers. Sea salt comes in many specific varieties since it gains some distinct flavor and coloring based on where it comes from and what sea minerals it carries with it. This salt really loses it's unique flavor when cooked or dissolved, but makes an excellent last minute garnish to add for both its texture and flavor. Kosher salt is the most effective at drawing out moisture due to its large crystalline structure, good for drying meats and other foods, and is easy to grab a pinch of during cooking because of the large flakes.

Are all 3 good to have on hand? Certainly! Are all 3 essential? Definitely not!

If nothing else, this post may at least save you from dumping all that nice sea salt from Aunt Sally into a big pot of water for boiling spaghetti!

Aproveche!
~Kai

Sunday, November 7, 2010

Chi Chi Dango!

Between two people, you figure we would post more than once a month... apparently that's not the case! I guess we are just lazy, because we have been cooking/baking quite a bit and have a stack of pictures waiting to be uploaded. It seems we just need a bit more motivation...

Coincidentally, Leah has unofficially begun a posting competition with me, and while I am not very competitive (read: extraordinarily competitive but unwilling to admit it) I think I might find myself posting more frequently.

So with this post I present to you my newest creation!

It's a specific type of mochi that I grew up eating. Traditionally mochi (for those of you that might only recognize it as a way to eat ice cream) was a Japanese treat made of cooked rice that was pounded into a sticky mess. While some people still do make it traditionally, like my good friend Cheryl, it is an incredibly laborious process and the mochi only lasts for a few days before it becomes rock hard.

That being said, there are many types of mochi and one I grew up with in Hawaii was chi chi dango. It's a coconut mochi and has a delightful chewy and sticky consistency that lasts at least a week unrefrigerated. I'm having a hard time comparing it to anything else, so you'll just have to try it yourself!

While buying a small container of this used to be really expensive, making an absurdly large amount to share with friends and family is surprisingly easy and cheap - perfect for my non-existent funds and short attention span. (oooh, something shiny!)

Without any more preamble here is the recipe:
1 lb of glutinous rice flour (you can find this in your local asian or international store. I got my pound for $0.75!)
2 1/2 cups of sugar
1 tsp baking powder
2 cups water
1 tsp vanilla extract
1 can coconut milk
potato starch for dusting

Mix together the rice flour, sugar, and baking powder. In a separate bowl mix together the water, vanilla extract and coconut milk. Whisk the rice flour mixture into the wet one and make sure it's well combined.

It will look like you really didn't do anything except pour milk into a bowl, but don't be fooled!

Now pour the concoction into a greased 9x13 pan. If you don't have a 9x13 like me, then use the largest one you have and make sure it doesn't overflow when you pour it all in (while I may not cry over spilled milk, I do over spilled coconut milk).

Cover the pan with foil, tenting it a bit in the middle (I didn't and the foil decided to adhere to the top of my mochi) and bake at 350 Fahrenheit for an hour.

When you take it out it will not look like it is done, in fact, you will be convinced that you just made a huge vat of ugly white glop. You might not be entirely off. Just make sure that the mochi doesn't have any pools of that milky liquid on top and set the pan aside to cool overnight. If you turn it out too early it will not hold it's shape and turn into some sort of goopy mess, so be patient. Do not refrigerate it, refrigerating mochi does something strange to it and makes it stiffer than it should be (in a bad way).


Now take that potato starch and dust it over the surface that you plan to cut the mochi on. I know you may be wondering where to get potato starch... I honestly don't know. I inherited my large container of the stuff along with a tacky lamp when I moved into the apartment, and since it wasn't growing anything it must still be good... right?

Take a plastic knife (if you don't happen to have one just wrap cling wrap around a butter knife) and loosen the mochi a bit, then turn over onto the starched surface. Use the knife to cut the mochi into little pieces and lightly dust each piece with potato starch. The starch keeps it from sticking to EVERYTHING, which you may have noticed that it does. Keep the dusting light though so you don't take away from the awesome flavor. I starched my hands and rubbed them over the sides just enough to make sure it didn't stick.
By the end of all of this you should have enough to share with pretty much everyone (that is if you don't scarf down all of them like I am apt to do). It keeps for about a week at room temperature, just be sure to put it in a little baggie so it doesn't dry out completely.
These can by dyed pretty colors if you have food coloring (add it to the mixture pre-baking), or could even be filled with super tasty azuki beans (sweet Japanese beans). Whether or not you end up adding a little pizazz to the chi chi dango, it's pretty darn tasty!

Itadakimasu,
~Kai